Displacement
The shape of the surface and the volume inside its mesh may be altered by the displacement shaders. This way, textures can then be used to make the mesh surface more detailed.
There are two types of displacement methods that can be used: True Displacement and Bump Mapping. Depending on the settings, the displacement may be virtual, only modifying the surface normals to give the impression of displacement, known as bump mapping, or a combination of real and virtual displacement.
Tip
It is also possible to use the both method by choosing Displacement + Bump in the Material Setttings.

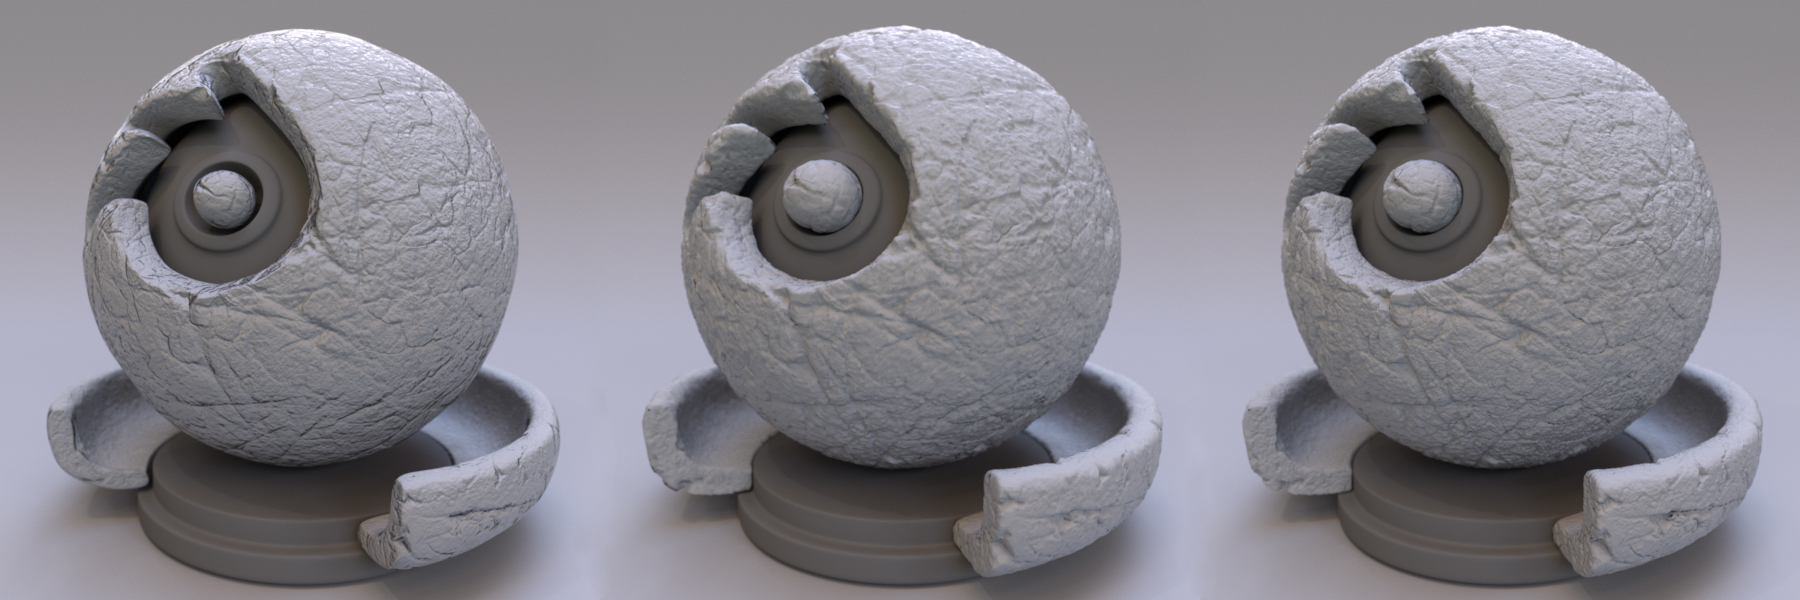
Subdivision Rate 2, Bump, True, Both
Bump Mapping
When using the Bump method for displacement a “bump map” is used to create fake displacement by using light and shadow effects. A bump map is actually one of the older types displacement methods (see True Displacement for a newer method).
Typically, bump maps are grayscale images with 8-bits of color information. This means that they only have 256 different shades of black, gray, or white. These grayscale values are used to tell Blender two thing: up or down.
When values in a bump map are close to 50% gray, there is little to no detail that comes through on the surface. When values get closer to white, the effect start to appear as if they are pulling out the surface. To contrast that, when values closer to black, they appear to be pushing into the surface.
Bump maps are really great for creating tiny details on a model, for example, pores or wrinkles on skin. Bump maps can be created in a 2D drawing, or photo editing application just remember to save the image as a grayscale to save memory while rendering.
Important
Because bump mapping is a fake effect, it is easily broken when viewing a model at the wrong angle. This means that it is not recommended for animations.
True Displacement
Note
Implementation not finished yet, marked as an Experimental Feature Set
Different from bump mapping, True Displacement is not a fake effect. When using True Displacement the actual mesh geometry will be displaced before render. This gives the best quality results, if the mesh is finely subdivided. As a result this method is also the most memory intensive.
When using true displacement you should not just use a bump map as the displacement texture. Different from bump maps displacement maps should not use 8-bits when saved. While you can use 8-bit textures, they do not translate into 3D space well. Instead, you should save the images with either 16 or 32-bits.
Tip
In order to get the appropriate amount of subdivision it is recommended to use Adaptive Subdivision
See also
The Displace Modifier can also be used to displace a mesh.
Controls
You may find that there is a limit to using True Displacement compared to using the Displace Modifier. However, These can be easy fixed with using a Math Node. In the example below is a node setup to give the same settings as the Displace Modifier.

Math nodes used to add Mid-level and Strength.
In the example above a math node is used twice, the first math node uses the add operator. This operation can be used to control the mid-level of the displacement. The second math node uses the multiply operation to control how strong the displacement effect is. Higher values would give you larger displacement and lower values give smaller displacement.